N8N webhook protection
In this tutorial we will create a new N8N webhook for contact form and will protect it with Private Captcha form proxy feature.
Short summary of “form proxy” is that by pointing your form to our endpoint, we check CAPTCHA solution and rate limit and then call your actual endpoint (in this case - N8N webhook).
Setup a page with a form
Create HTML form
Let’s create a basic form:
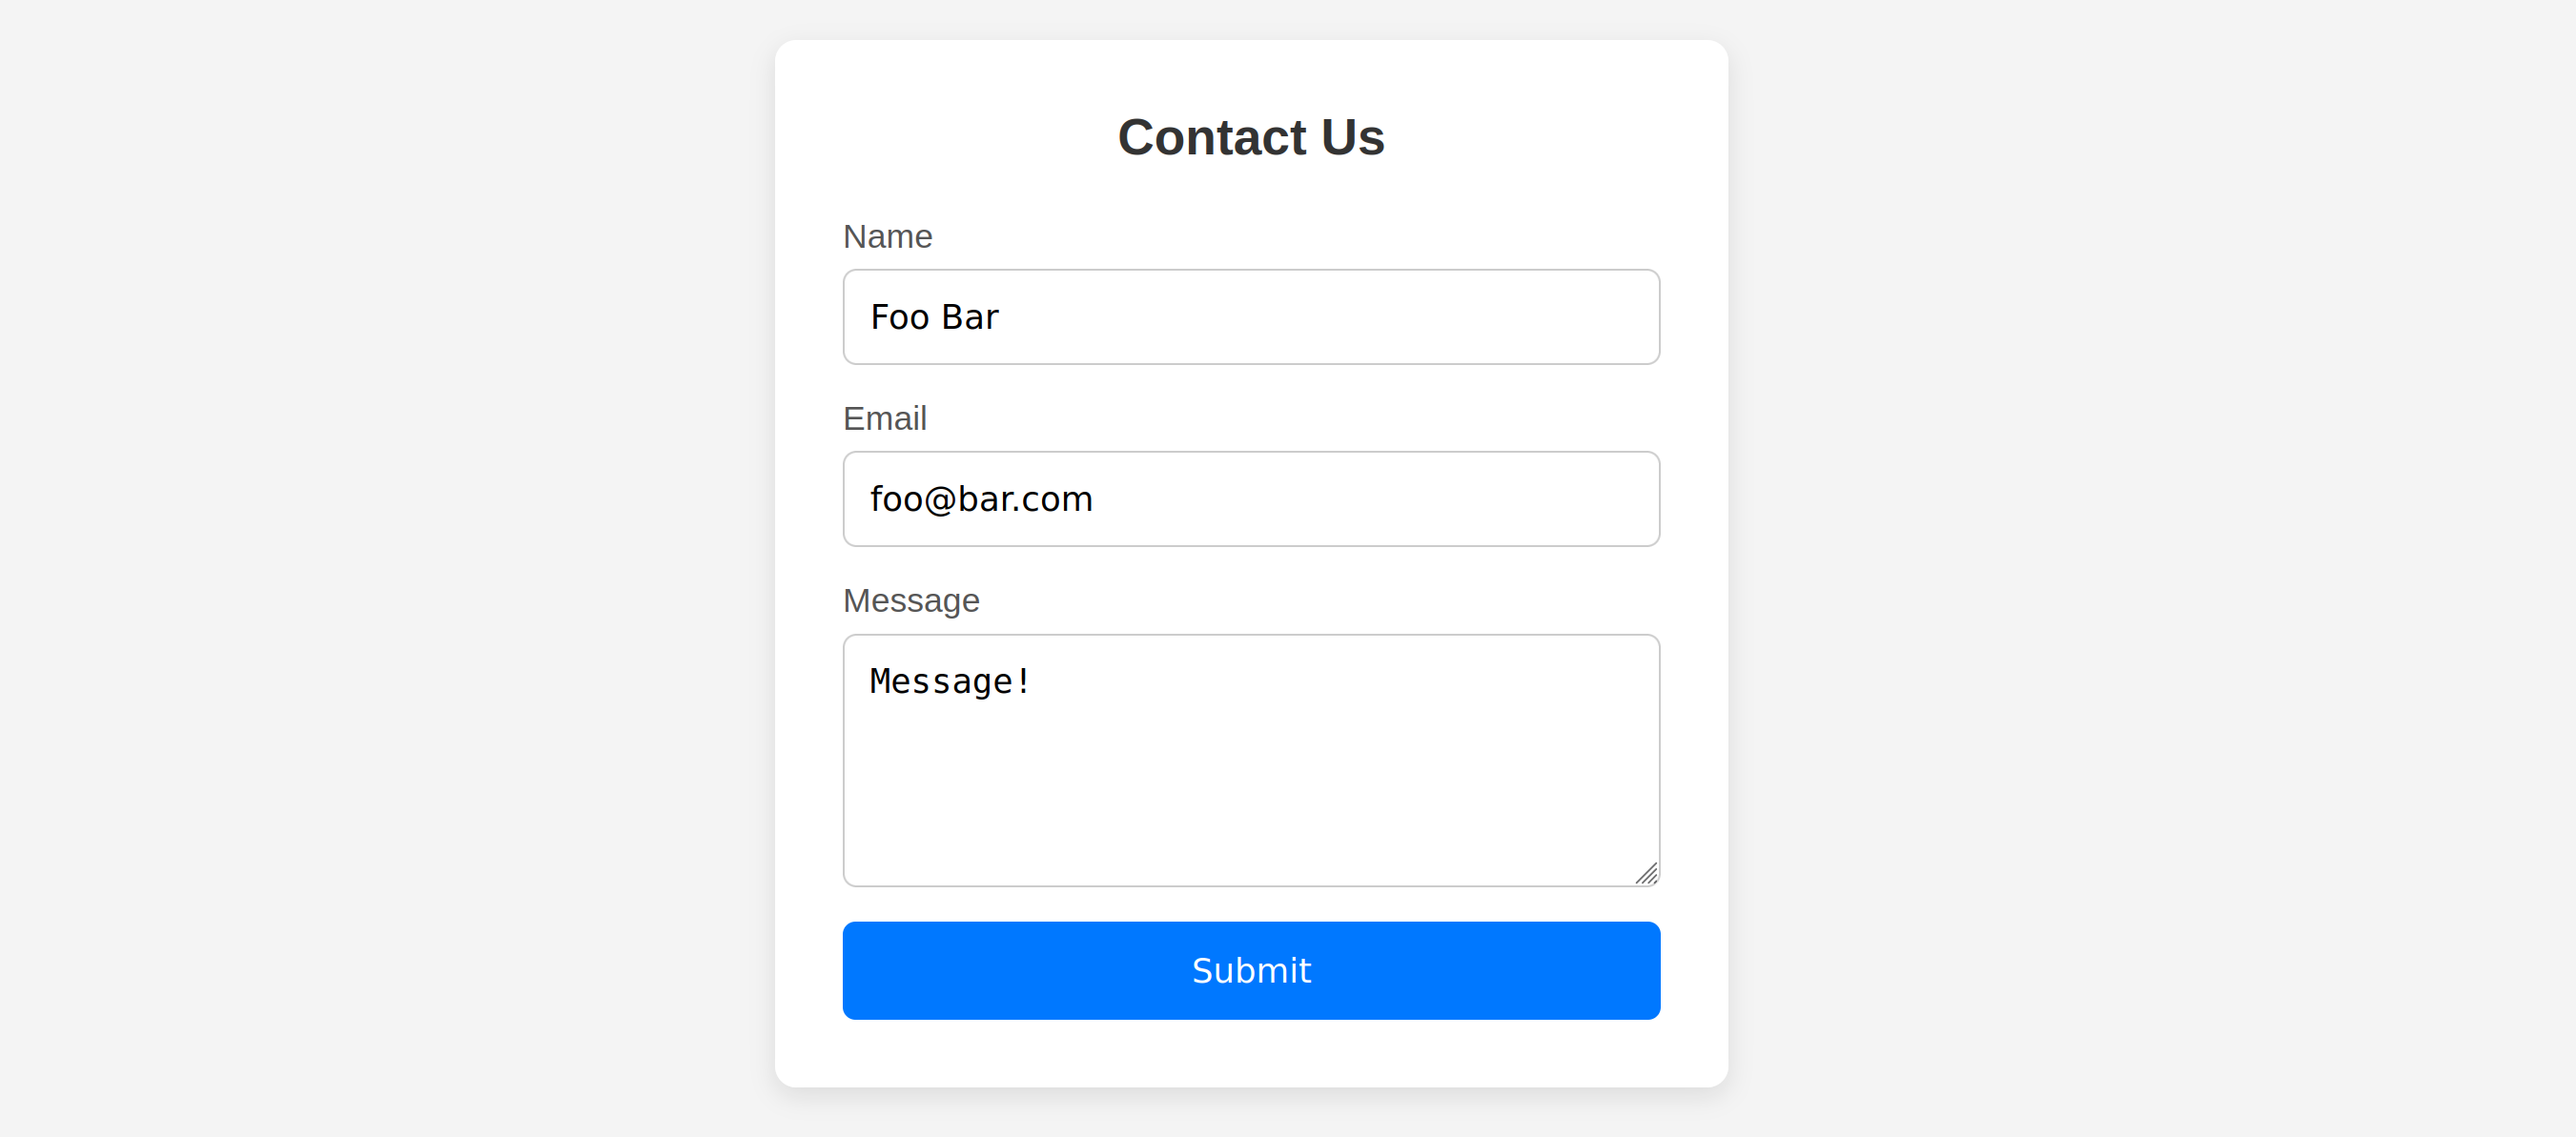
There’s nothing fancy inside:
<body>
    <div class="form-container">
        <h2>Contact Us</h2>

        <form action="#" method="post">
            <div class="form-group">
                <label for="name">Name</label>
                <input type="text" id="name" name="name" required >
            </div>

            <div class="form-group">
                <label for="email">Email</label>
                <input type="email" id="email" name="email" required >
            </div>

            <div class="form-group">
                <label for="message">Message</label>
                <textarea id="message" name="message" required></textarea>
            </div>

            <button type="submit">Submit</button>
        </form>
    </div>
</body>Process form in N8N
To be able to submit this form, let’s create a new workflow in N8N and for Trigger select a webhook:

Test URL by default - we will switch to Production URL later.Now use the webhook URL as the form’s action attribute:
@@ -80,7 +80,7 @@
         <h2>Contact Us</h2>
-        <form action="#" method="post">
+        <form action="https://n8n.yourdomain.com/webhook-test/d41b4068-af05-4e82-8eb9-5fbf50409f37" method="post">
             <div class="form-group">
                 <label for="name">Name</label>
Test webhook
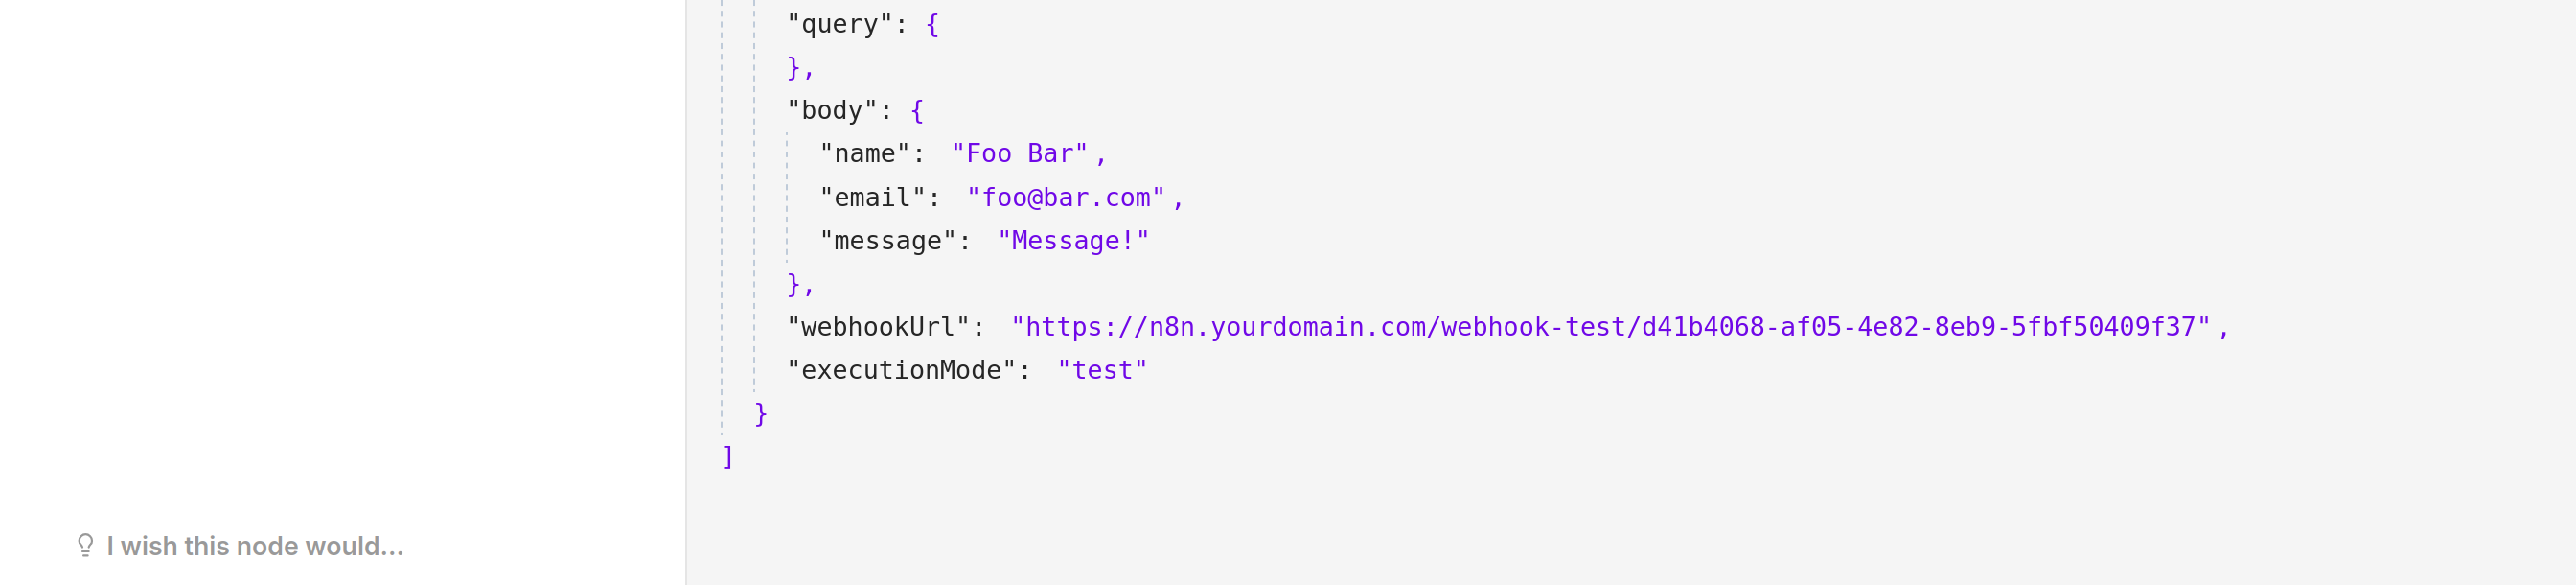
When we click “Test webhook” in N8N and submit a form (e.g. from your browser), we will receive an event:
Webhook protection
If you will just deploy this to your website, the problem is that this webhook is available publicly. Everyone who opens your webpage, can just access the URL and send millions of requests with spam.
To fix that, we will add a captcha widget to the form and proxy it through Private Captcha server that will verify the CAPTCHA solution first.
Create form proxy
In Private Captcha Portal, click “New Form Proxy”:
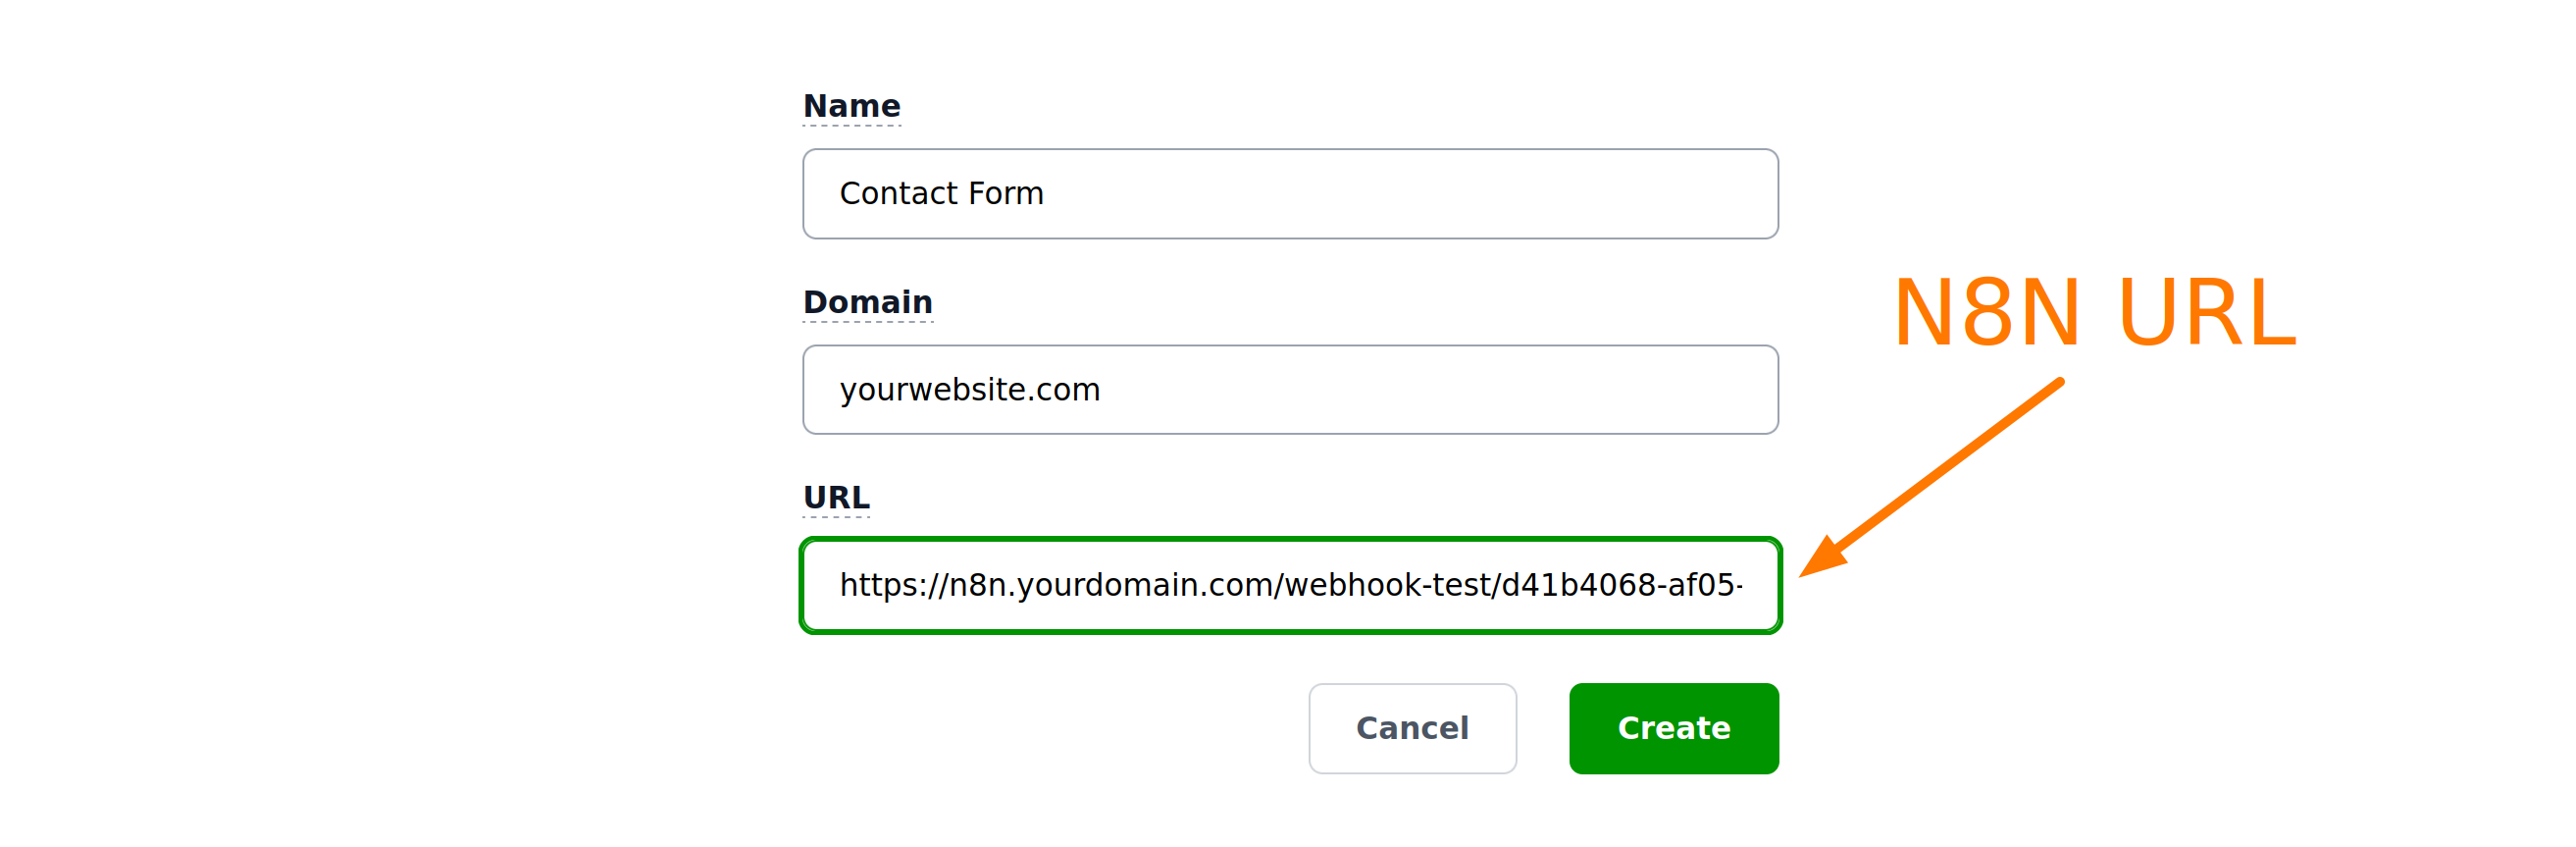
For the Domain, enter the domain of your website (where contact form is hosted) and for URL, enter the URL of the webhook from N8N (the one you put into form’s action attribute).
Integrate form on the website
After you’ve created the form, you will be presented with integration steps. Here we duplicate them:
Add captcha widget include
In the head of the website, we need to add widget include:
@@ -75,6 +75,7 @@
             background-color: #005fcc;
         }
     </style>
+    <script defer src="https://cdn.privatecaptcha.com/widget/js/privatecaptcha.js"></script>
 </head>
 <body>
     <div class="form-container">
Update form action URL
We will use a URL generated by Private Captcha for our action attribute, instead of direct link to N8N webhook.
@@ -75,12 +75,13 @@
         <h2>Contact Us</h2>
-        <form action="https://ndmtion.intmaker.com/webhook-test/d41b4068-af05-4e82-8eb9-5fbf50409f37" method="post">
+        <form action="https://api.privatecaptcha.com/form/21dce88d638f4174aa8a6d1e2605903a" method="POST" >
             <div class="form-group">
                 <label for="name">Name</label>
Add captcha widget to the form
@@ -110,6 +111,7 @@
                 ></textarea>
             </div>

+            <div class="private-captcha" data-sitekey="a3bb25a00ba04664943754715ada96c9"></div>
             <button type="submit">Submit</button>
         </form>
     </div>
And disable the submit button by default, enabling it only when captcha is solved:
     </style>
     <script defer src="https://cdn.staging.privatecaptcha.com/widget/js/privatecaptcha.js"></script>
+    <script>
+        function onCaptchaSolved() {
+            document.querySelector('button[type="submit"]').disabled = false;
+        }
+    </script>
 </head>
 <body>
@@ -110,7 +122,8 @@
             <div class="private-captcha" data-sitekey="a3bb25a00ba04664943754715ada96c9"
+                 data-finished-callback="onCaptchaSolved"></div>
-            <button type="submit">Submit</button>
+            <button type="submit" disabled>Submit</button>
         </form>
     </div>
If you did it correctly, by default the form submit button will be disabled:

And when the captcha is solved, submit button becomes enabled:

Allow localhost in Property settings (you can click “Manage” in form settings)Going live
Switch to N8N Production Webhook URL
By default N8N webhook gives you Test URL and you need to switch to Production URL in the end.

You can also update this URL in Private Captcha Portal in your form’s settings (if it’s still using Test URL there). Note that you have a single Private Captcha Form URL - you only change N8N URL in settings.
Final testing
This is not required, but a good chance to test if everything is wired up together correctly.
Via Private Captcha
In Private Captcha portal in your form’s settings, you have an option to Test the webhook:
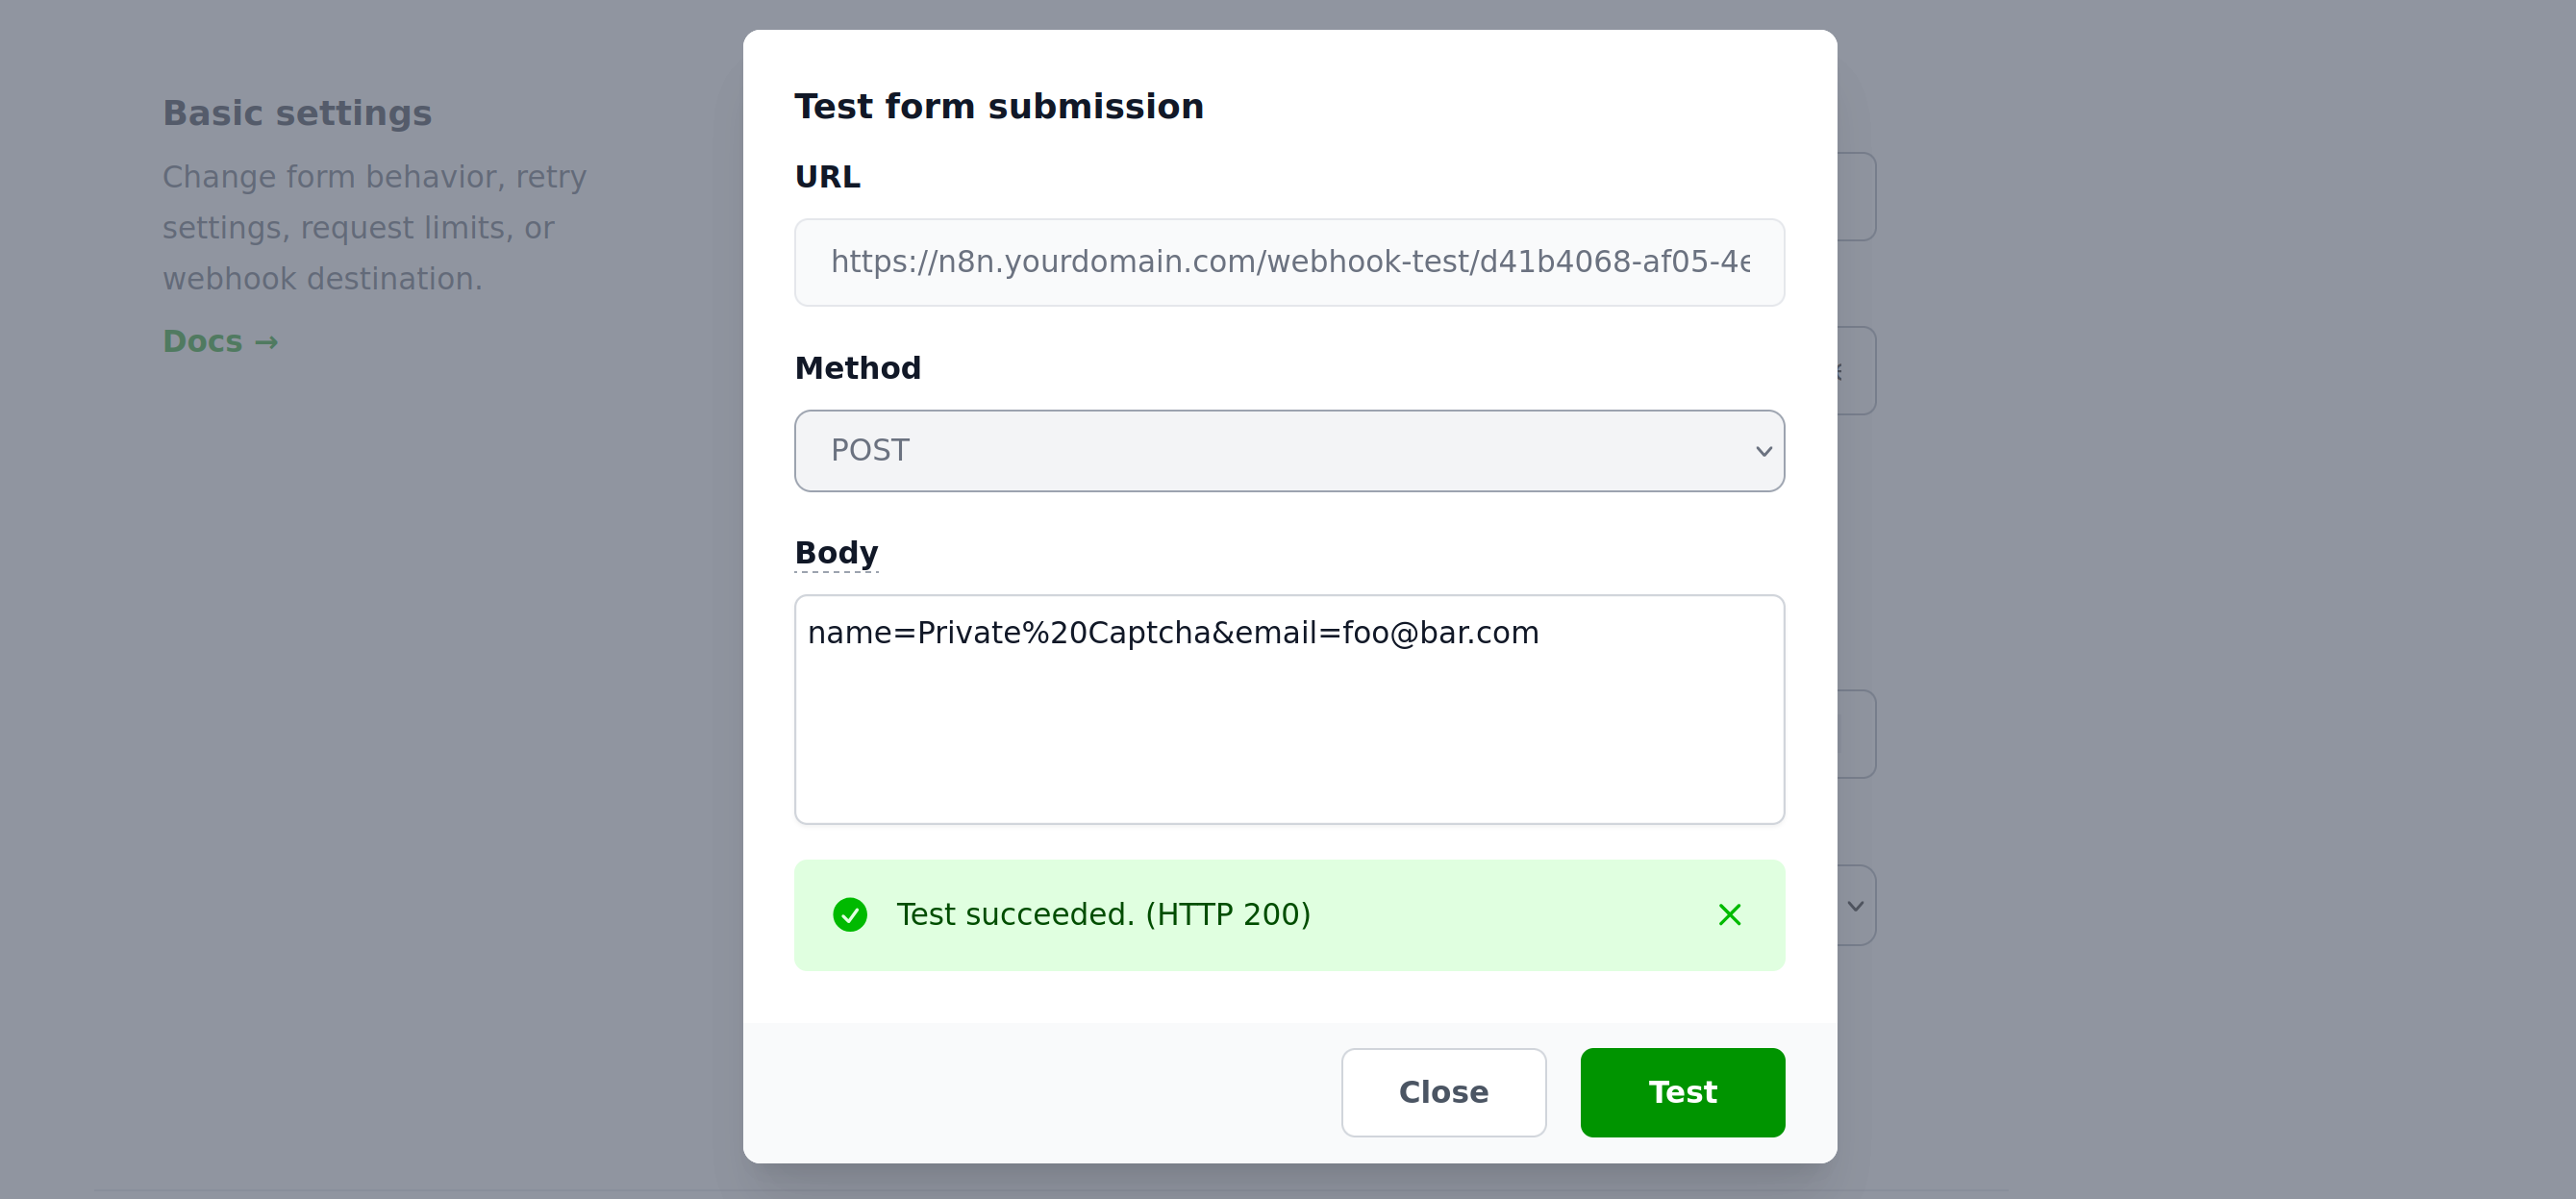
You can observe this data arriving in N8N:

On your website
And, finally, make sure everything works together by visiting your website and submitting your form.
Now your actual N8N webhook will only receive the submissions that passed CAPTCHA and rate limiting and they are hidden from public by default.