Getting started
Prerequisites
- A Private Captcha account (sign up if you don’t have one)
Setup steps
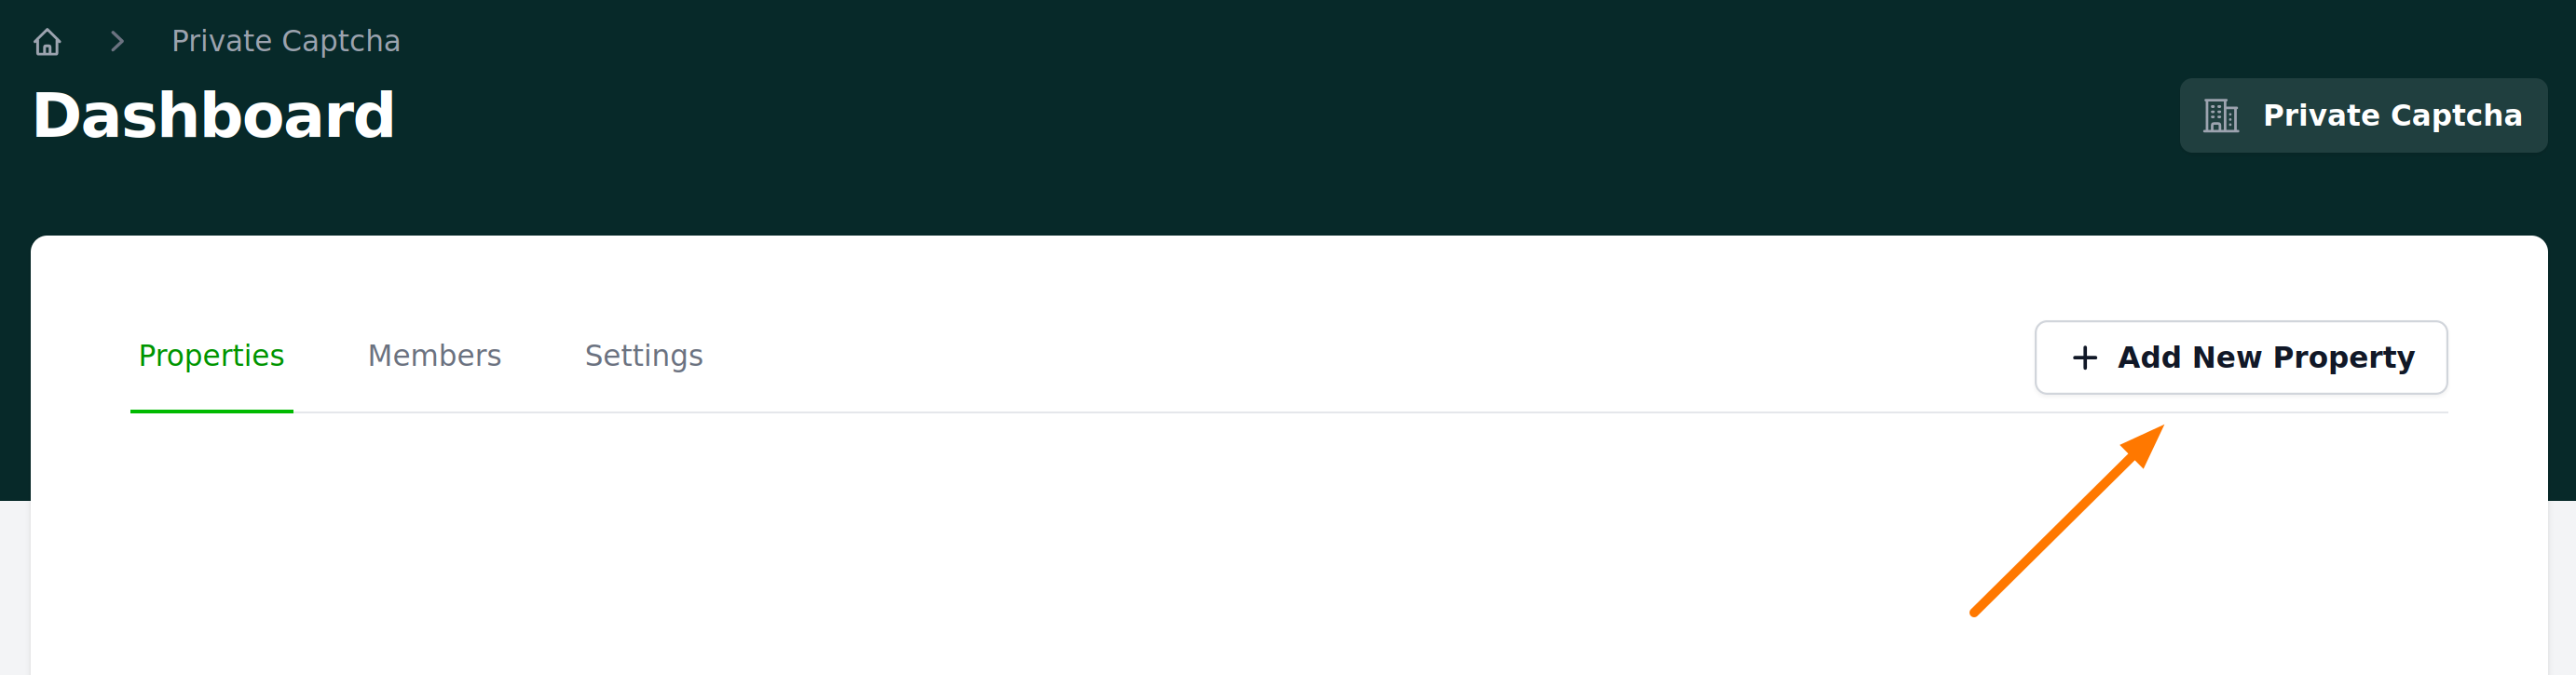
Create a new property in Private Captcha portal
A property represents a single CAPTCHA widget that can be used on a website, web page, or form. Each property is identified by a unique Sitekey.
Go to Private Captcha Portal and click “Add new property”.
Enter a name for your property (e.g., “My Website”) and the domain where you’ll use the CAPTCHA (e.g., example.com).
Warning
The domain should exactly match your website domain. For local development, you’ll need to enable “Allow localhost” in property settings later.

Click “Create” to complete property creation.
Note Sitekey of the property
After creating the property, you’ll be presented with an integration snippet. The Sitekey is visible in the widget configuration.
Alternatively, you can find it later by opening your property in the portal, going to the “Integrations” tab, and noting the Sitekey value.

The Sitekey looks like aaaaaaaabbbbccccddddeeeeeeeeeeee and is used for the client-side widget initialization.
Create a new API key
API keys are used for server-side verification of CAPTCHA solutions. Each API key has an expiration date and can be revoked at any time.
Go to API key settings and click “Create new key”. Give it a meaningful name (e.g., “Production API key”, “WordPress API key”), and select scope Captcha verification (default).

Set an expiration date and click “Create”.
Copy and store your API key
After creation, the API key value will be displayed. Copy it immediately and store it securely (e.g., in a password manager).
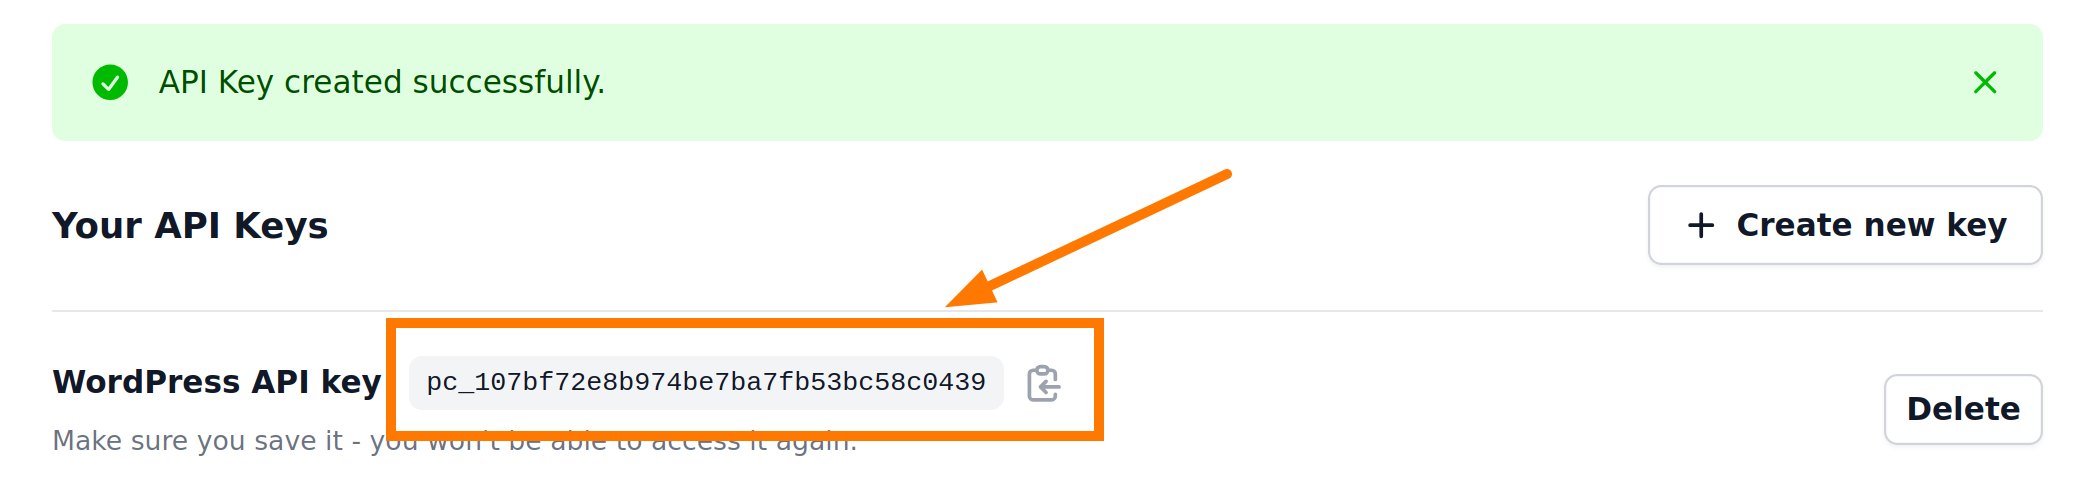
Warning
The API key value is only shown once. If you lose it, you’ll need to create a new API key. Store it securely and never commit it to version control.
Security checklist
Just few useful thing to check if everything is setup correctly:
- You cannot submit your HTML form without having to click captcha widget (form submission is not blocked automatically, you have to hook into captcha solved event)
- Your backend form processing does not process the form submission without verifying captcha first
Next steps
Now that you have a property with a Sitekey (for client-side widget) and an API key (for server-side verification), you can proceed to: