Testing
There’re 2 main ways how you can keep using Private Captcha for testing of your local website:
- use a predefined (“dummy”) sitekey
- allow localhost access for main property in Settings in portal
Testing with predefined sitekey
Recommended way to use Private Captcha for development is to use different sitekeys for production and testing. For testing you can use a “dummy” sitekey (aka “test property”): aaaaaaaabbbbccccddddeeeeeeeeeeee. This sitekey does not incur any actual solving “price” (in compute resources) on the frontend and the result always passes verification. Please note that captcha widget still has to be clicked to pass by default, unless you are using data-start-mode="auto" (in which case parent form needs to gain focus).
Client side
This is a sample captcha widget for testing:
<div class="private-captcha" data-sitekey="aaaaaaaabbbbccccddddeeeeeeeeeeee">
</div>
Note
Widget will show red "testing" text to highlight that it’s not for production use once you click it.
Server side
On the server side, once you are using Verify API { "error-codes": ["property-test"] } (non-empty error codes). Of course, you should be mainly checking success field and error-codes semantics is just to distinguish actual errors.
Note that by default when using “dummy” sitekey, the response will have {"success": false} to prevent security issue where a stub puzzle can be added to any form instead of the valid puzzle. However, if you’re using X-PC-Sitekey header with test property sitekey, the response will have {"success": true}.
Sending verify request
This is a sample payload for test property, that should always return “success” (please note this is for illustration purposes only as payload can change)
curl \
  -X POST \
  -H "X-Api-Key: your-api-key" \
  -H "X-PC-Sitekey: aaaaaaaabbbbccccddddeeeeeeeeeeee" \
  -d "AQIAAAAAAAAAAAAAAAAAAAAAAAAAAAAAAAAAAAAAAAAAAAAAAAAAAAAAAAAAAAAAAAAAAAAAAAAAAAAAAAAAAAAAAAAAAAAAAAAAAAAAAAAAAAAAAAAAAAAAAAAAAAAAAAAAAAAAAAAAAAAAAAAAAAAAAAAAAAAAAAAAAAAAAAAAAAAAAAAA.Aaqqqqq7u8zM3d3u7u7u7u4AAAAAAAAAAAAQAAAAAAAAAAAAAAAAAAAAAAAAAAA=.AQCBnM2czBK6rlq+l06lXBtIDQH/PFk=" \
  https://api.privatecaptcha.com/verify
And if everything is set up correctly, the output will be
{"success":true,"code":10,"timestamp":"0001-01-01T00:00:00Z","origin":""}Code 10 corresponds to "property-test" error description.
Testing with localhost access
Warning
Captcha has a strict CORS policy and, by default, it will load only on the domain configured during property creation. Subdomains and localhost access needs to be explicitly allowed.
In order to make captcha widget to load on localhost domain, we need to allow it in the settings of the property you just created.
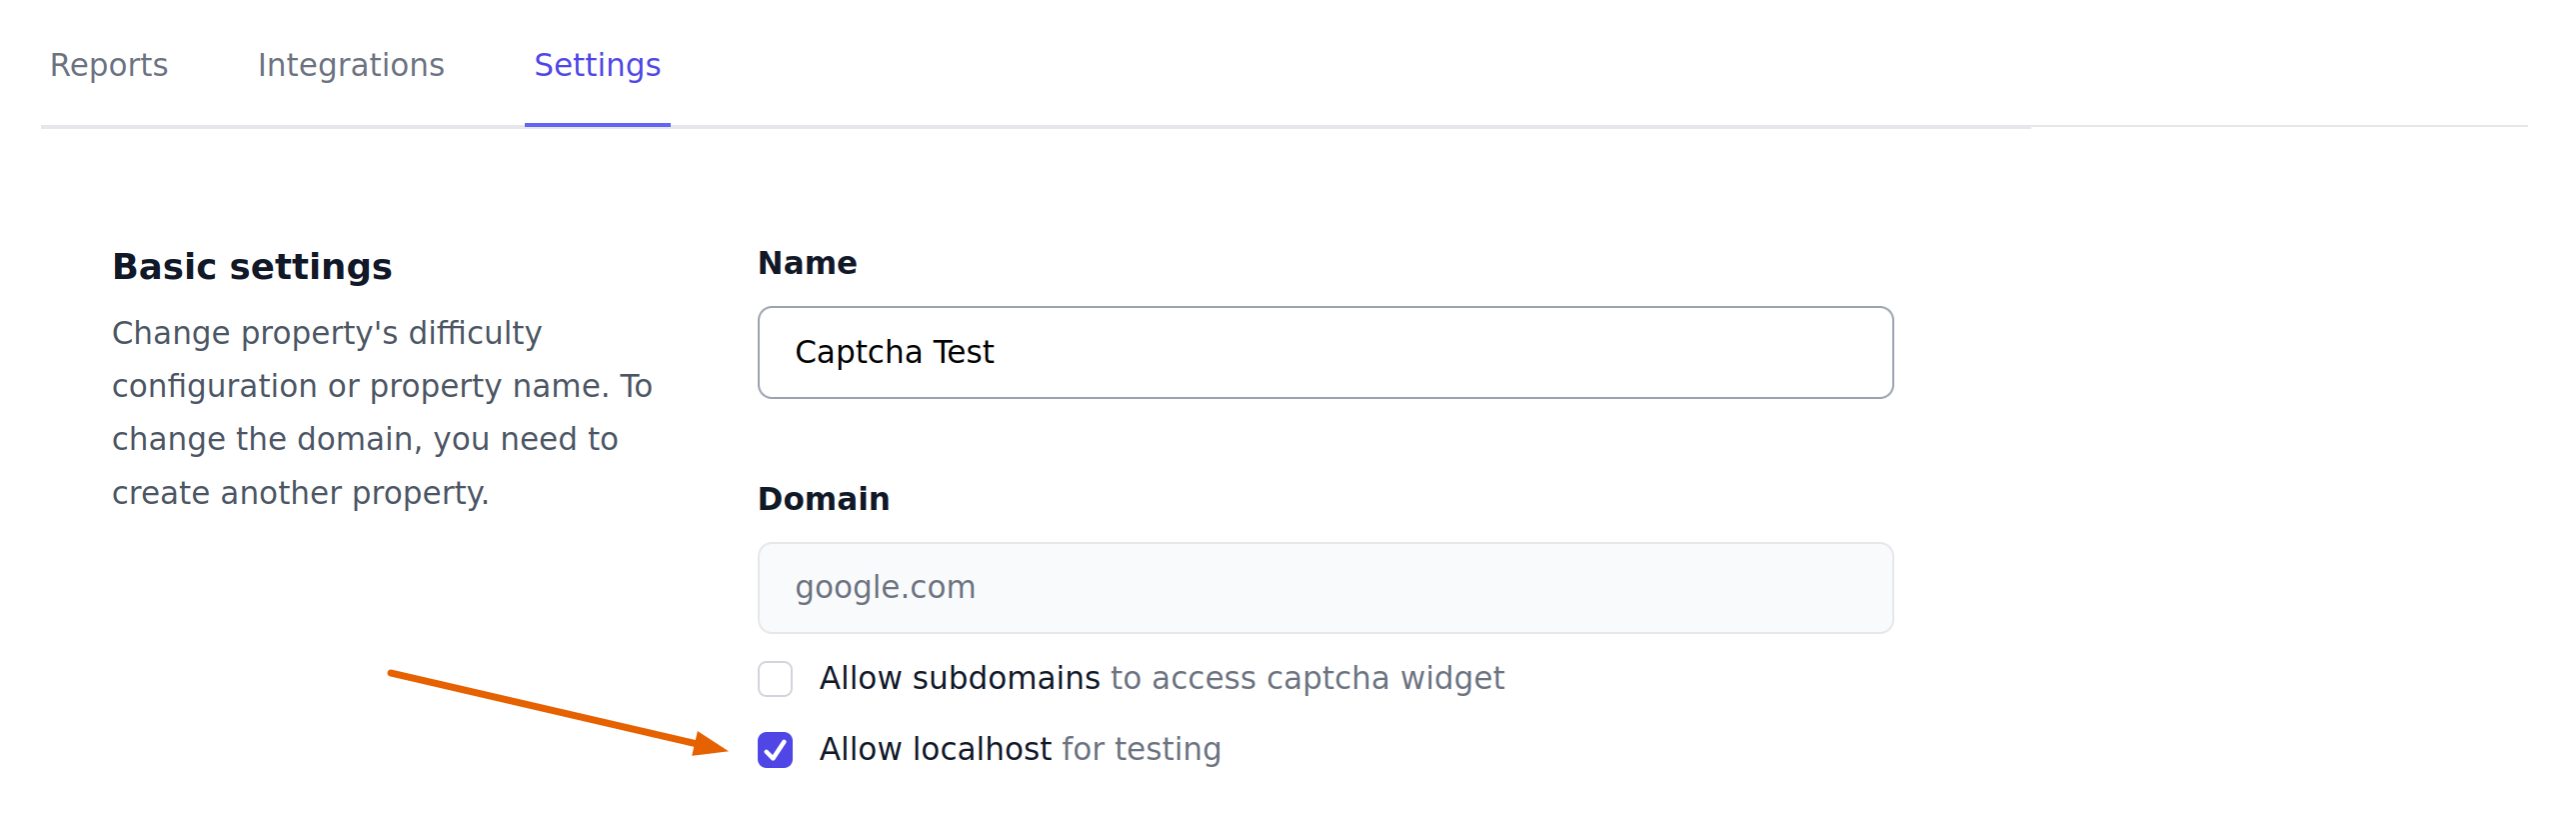
Worth noting that this is not required if you use the dummy sitekey.